If you’re dealing with bubbling, peeling, flaking or hairline cracking paint in a Sydney home, it’s rarely “just bad luck”. Most paint failures trace back to a small number of root causes: moisture (leaks, condensation, rising damp), poor surface preparation, incompatible coatings, or painting in conditions that don’t suit the product. And yes, it can show up even after a fresh house painting job if the underlying issue wasn’t identified first. The good news is that you can usually diagnose what’s happening by looking closely at where the problem appears, what it looks like, and when it started. Once you treat the cause (not just the symptom), the fix is straightforward, and the result lasts.
This guide breaks down the most common reasons paint fails in Sydney conditions, how to tell them apart, and what to do next.
First: what the defect is telling you
Paint doesn’t fail randomly. Different defects point to different triggers.
Bubbling and blistering
Bubbles are raised domes in the paint film. They may feel firm (trapped solvent/heat) or soft (moisture). Blistering is often the same thing but used more for exterior paint.
Common Sydney triggers include:
• Steam-heavy bathrooms and laundries with poor ventilation
• Coastal moisture and salt-laden air in suburbs near the water
• Wind-driven rain hitting a wall with failed sealant, cracked render, or leaky flashing
• Painting when the humidity is high, so moisture can’t escape through the coating properly
Peeling and flaking
Peeling is paint lifting away in sheets or strips; flaking is smaller pieces coming off.
This usually means adhesion failure caused by:
• Moisture getting behind the paint film
• Painting over chalky, dusty, glossy, or contaminated surfaces
• Skipping the right primer/undercoat
• Applying a new coating system that doesn’t bond well to the old one
Cracking (hairline, crazing, “alligator” cracks)
Cracks can be tiny hairlines or a wider pattern resembling reptile skin. This often relates to:
• Too many coats over time (a thick, brittle film)
• Applying a hard/brittle coating over a flexible substrate
• Rapid drying (heat, sun, wind) causes the surface to “skin over” while the layer underneath moves
• Movement in the substrate (settling cracks, timber movement, vibration)
A quick diagnosis you can do at home
Before you scrape anything, take 5 minutes to investigate. It can save you from redoing the same patch twice.
Step 1: Where is it happening?
Use location as your first clue.
• Bathroom ceiling or above the shower: usually condensation/steam, sometimes a leak from above
• Skirting boards, lower wall edges, corners: rising damp, bridging (soil/mulch too high), or persistent moisture
• Around windows/doors: failed sealant, water ingress, condensation on cold frames
• Near gutters/downpipes/external corners: overflow, leaks, or wind-driven rain
• West- or north-facing exterior walls: heat and UV stress, plus fast drying and thermal movement
Step 2: What does it look like?
• Big soft bubbles that collapse when pressed can indicate moisture behind the film
• Small hard blisters can indicate heat/solvent issues or painting over a damp surface
• Peeling down to bare plaster is different from peeling between paint layers
• Cracks that follow plaster joints can indicate substrate movement, while “alligator” patterns often indicate an old, brittle build-up of layers
Step 3: When did it start?
• Within days to a few weeks of painting, prep/compatibility/conditions are likely
• After heavy rain: water ingress, gutters, flashing, external cracks, or rising damp
• Only in winter: condensation and ventilation issues become more obvious
• Mainly in summer on sun-exposed walls: heat stress and rapid drying issues
Step 4: Do a simple tape test (for adhesion)
If the paint is already flaking, gently press good-quality masking tape onto a “healthy-looking” area near the failure, then peel it off quickly.
• If significant paint comes off, adhesion is poor, and spot patching may not hold
• If it holds, you may be able to repair locally (after fixing the root cause)
The big causes in Sydney and how to recognise them
1) Moisture behind the paint film
Moisture is the number-one reason for bubbling and peeling. In Sydney, this often comes from a mix of rainfall events, coastal humidity, and indoor condensation.
Signs it’s moisture:
• Bubbling that returns after rain or showers
• Dark staining, soft plaster, or a damp smell
• Mould spotting or recurring discolouration
• Salt-like white deposits on masonry (often efflorescence)
What to do:
• Identify the source first: roof leaks, overflowing gutters, cracked pointing, failed sealant, plumbing leaks, shower waterproofing, or rising damp
• Improve ventilation in wet areas (exhaust fan that vents outside, not into the roof void)
• For exteriors, check water management: gutters, downpipes, flashing, and any cracks that channel water into the wall system
• Let the substrate dry thoroughly before repainting. If you paint over damp plaster or masonry, you’re trapping moisture and inviting failure
Sydney tip: If you’re timing repairs, it helps to understand seasonal humidity and rain patterns. The Bureau of Meteorology’s climate data is a reliable reference point for local conditions. See Bureau of Meteorology climate data for the Sydney context.
Q&A
Can humidity alone cause paint to bubble?
Yes. High humidity slows drying and can trap moisture or solvents under the surface. In bathrooms, humidity combines with condensation on cooler surfaces (like ceilings and external walls), which can weaken the bond between paint and substrate over time.
2) Painting over poor preparation (dust, chalk, gloss, or contamination)
Even if moisture isn’t the issue, paint can peel if it never bonded properly. Common culprits include:
• Chalking (a powdery residue on older exterior paint)
• Dust from sanding not fully removed
• Grease, soap residue, or hair products on bathroom walls
• Glossy enamel trims painted without proper deglossing and priming
• Patchy filler that wasn’t sealed evenly
Signs it’s prep-related:
• Peeling between layers (old paint still attached to the wall, new paint coming off)
• Failure mostly around patch repairs
• Paint scratches off easily with a fingernail in multiple areas
• No water staining or dampness behind the film
What to do:
• Wash properly (sugar soap or suitable cleaner) and rinse well
• Remove chalking by scrubbing and/or sanding until stable
• Sand gloss surfaces to a dull finish (or use a bonding primer suitable for glossy coatings)
• Dust off thoroughly and wipe with a damp cloth before priming
• Prime bare plaster, filler, or timber with the correct primer/undercoat for the substrate
If you want a practical overview of how preparation affects long-term results, start with interior and exterior painting help and focus on the prep stages before you even think about topcoats.
Q&A
Should I scrape all the paint off or just the loose bits?
Only remove paint that’s loose, lifting, blistered, or poorly bonded. The goal is a stable edge you can feather out. If the surrounding paint fails a tape test, or if peeling is widespread, you may need a broader strip-back to a sound layer.
3) Incompatible coatings (the “wrong system” problem)
Sometimes paint fails because the new coating doesn’t like what’s underneath. This can happen when:
• Painting a water-based product over an old oil-based coating without the right primer
• Using a low-quality topcoat over an old glossy enamel without proper prep
• Mixing systems that cure differently (hard over flexible)
• Applying new paint over a surface that has surfactants or contaminants bleeding through
Signs of compatibility:
• Peeling in sheets with a clean separation line between layers
• Bubbling that appears soon after painting, especially in warm weather
• Paint that looks fine, but can be peeled back like a film
What to do:
• Identify the existing coating if possible (older trims may be oil-based enamel)
• Use a suitable bonding primer to bridge between old and new systems
• When in doubt, test a small area first and allow full cure time before proceeding
Q&A
How can I tell if the old paint is oil-based?
A simple (careful) test: lightly rub a small area with methylated spirits on a cloth.
• If it softens and transfers colour, it’s likely water-based
• If it stays hard and doesn’t transfer, it may be oil-based
If you’re unsure, assume you need a high-adhesion primer and prep thoroughly.
4) Painting in the wrong conditions (heat, sun, humidity, or poor airflow)
Sydney weather can change quickly, and paint is sensitive to conditions.
Common scenarios:
• Exterior walls painted in direct afternoon sun (west-facing)
• Painting ahead of rain, or when overnight dew is likely
• Interiors painted with windows shut and no airflow (slow cure)
• Thick coats applied to “get it done faster” (trapped solvents and weak film)
Signs it’s condition-related:
• Bubbles appearing in a tight cluster on sun-exposed areas
• Cracking that looks like fine crazing
• Soft paint that stays tacky longer than expected
• Peeling that starts soon after the job, even with decent prep
What to do:
• Avoid painting in direct, harsh sun; follow the shade around the house
• Keep coats to the manufacturer’s recommended coverage
• Allow proper drying time between coats (longer in humid conditions)
• Improve ventilation indoors during curing, especially in bathrooms and laundries
How to fix bubbling, peeling, or cracking paint (the durable method)
Below is a step-by-step approach that works for most interior and exterior situations. The exact products depend on the surface (plaster, timber, masonry, or render) and the cause you’ve identified.
1) Fix the cause first
This is non-negotiable.
• If it’s a leak: repair plumbing/roofing/flashing first
• If it’s condensation: improve ventilation, reduce moisture build-up, and address mould properly
• If it’s rising damp, get the damp source assessed and resolved before repainting lower walls
• If it’s water management: fix gutters, downpipes, grading, and external cracks
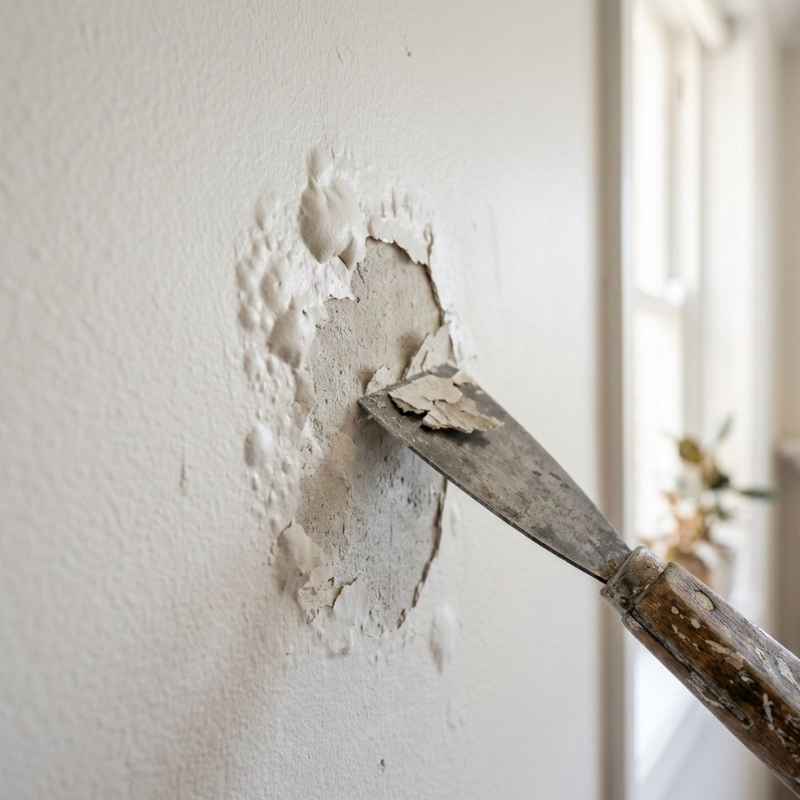
2) Remove failed paint back to a sound edge
• Scrape and sand all loose/failed material
• Feather the edges so you don’t see a sharp ridge after repainting
• For cracking, remove brittle paint where it’s breaking down; don’t paint over unstable layers
Safety note for older homes: If your property is older and you suspect lead-based coatings, use safe work practices and consider professional assessment before aggressive sanding.
3) Clean and dry properly
• Wash away dust, chalk, and residues
• Treat mould with an appropriate cleaner and address the moisture source (mould will return if moisture stays)
• Let the area dry thoroughly. “Dry to the touch” is not the same as dry enough to trap-free repaint
4) Prime correctly (this is where most DIY repairs fail)
Priming isn’t optional when you’ve exposed bare substrate or you’re bridging between old and new coatings.
• Bare plaster and filler: use a sealer/undercoat designed for plaster
• Bare timber: use timber primer (and address tannin bleed if needed)
• Masonry/render: use a masonry sealer/primer suited to the surface and condition
• Glossy or hard-to-bond surfaces: use a high-adhesion/bonding primer
If you’re unsure which repair pathway fits your situation, this guide to help with fixing peeling paint can help you match the symptom (peel/bubble/crack) to the most common causes before you recoat.
5) Recoat in sensible conditions
• Use thin, even coats rather than one heavy coat
• Respect drying and recoat times (extend them in humid weather)
• Keep airflow moving indoors, especially in wet areas
• For exteriors, plan around shade, wind, and rain risk
Q&A
Do I need to prime if I’m only patching a small area?
If you’ve exposed bare plaster, timber, or masonry, yes. Even small bare patches can cause flashing (different sheen/colour) and weak adhesion without primer. If you’re only sanding and repainting intact paint with good adhesion, primer may not be required—but it’s often beneficial if the surface is glossy, stained, or uneven.
Prevention: how to stop it coming back in Sydney homes
Ventilation and moisture control
• Run bathroom fans during showers and for at least 10–20 minutes after
• Keep doors closed in steamy areas and open windows where practical
• Use appropriate paint products for bathrooms and laundries (mould-resistant systems help, but they’re not magic if ventilation is poor)
Exterior water management
• Keep gutters and downpipes clear (overflowing gutters soak walls)
• Seal gaps around windows and penetrations before repainting
• Repair cracks in render and pointing so water can’t track behind the coating
Prep like it matters (because it does)
A durable finish is mostly preparation. If you want a simple mental checklist for any repaint:
• Is the surface clean?
• Is it dry?
• Is it stable (no loose paint/chalking)?
• Is it dull (not glossy) where it needs to be?
• Is it primed where it needs to be?
If you’d like a broader overview of the prep steps that prevent common failures, start with professional house painters in Sydney and pay special attention to surface prep and primer selection.
Choose products that match the surface and exposure
• Coastal exposure benefits from systems suited to higher salt and moisture
• Sun-exposed walls benefit from durable exterior coatings and good prep
• Wet areas benefit from suitable kitchen/bathroom paint systems plus ventilation
When a “simple paint problem” is actually a bigger building issue
Paint is a coating, not a waterproofing system. If you see any of the following, treat it as a building moisture issue first:
• Repeated bubbling/peeling in the same spot after multiple repaints
• Soft, crumbling plaster or persistent damp smell
• Visible mould that returns quickly after cleaning
• Efflorescence (salty white deposits) pushing through paint on masonry
• Staining that grows after rain events
• Peeling concentrated at the base of walls (possible rising damp)
FAQ: bubbling, peeling and cracking paint in Sydney
Why is my paint bubbling right after painting?
Most often it’s moisture in the substrate, painting in high humidity, applying coats too thickly, or coating incompatibility. If bubbles appear within days, review prep and conditions first, then check for hidden damp.
Can I paint over bubbling paint?
Not if it’s actively blistering or loose. You need to scrape back to a sound edge, identify whether moisture is present, dry the area, prime appropriately, and then repaint.
Why does paint peel in bathrooms even when it’s “bathroom paint”?
Bathroom products help, but they can’t overcome constant condensation and poor ventilation. Steam and moisture will eventually weaken adhesion unless airflow removes humidity, and surfaces can dry between uses.
What causes hairline cracks in paint on walls?
It can be substrate movement (plaster joints, settlement), brittle paint build-up from many old layers, or fast surface drying (sun/heat/wind) that stresses the film. The best fix depends on whether the cracking is in the paint layer only or reflects movement underneath.
Is peeling paint always a moisture problem?
No. Moisture is common, but peeling can also be caused by poor prep (dust/chalk/soap), painting over gloss without bonding primer, or incompatibility between old and new coatings.
How long should I wait before repainting after fixing a leak?
Long enough for the substrate to fully dry, which depends on the severity of saturation, material type, airflow, and weather. If paint failure happened because moisture was trapped, repainting too soon often recreates the same problem.
Should I use a stain blocker on water stains?
Often, yes—once the leak is fixed and the area is fully dry. A stain-blocking primer can prevent tannins or water stains from bleeding through the new finish. Match the primer type to the stain and surface.
What if the paint keeps failing in the same area?
That strongly suggests an unresolved cause: ongoing moisture, persistent ingress, rising damp, or unstable substrate. Repainting alone won’t solve it.